
How to Choose Silver Ink for Screen Printing

Silver Ink For Screen Printing can add a bright, reflective finish to a garment, but the right choice depends on more than the shade in the container. Fabric color, fiber type, mesh count, and the desired level of shine all affect the printed result. A silver that looks crisp on black cotton may appear dull on a textured blend. Test it on the actual substrate.

This guide looks at the practical details that shape a reliable choice: opacity, particle size, print feel, curing requirements, and compatibility with the press setup. A small test print can reveal issues that a product description cannot, including clogged mesh, uneven coverage, or a rough hand. Check the manufacturer’s technical data sheet, and follow its stated mixing and curing instructions. Metallic finishes can be less forgiving than they look.

One detail needs careful sourcing: no article or verifiable expert quotation was supplied, so I won’t invent a specialist’s name or attribute an unverified sentence to one. Before publication, add a confirmed quotation from a named screen-printing professional, ideally one who has tested metallic inks on comparable fabrics. The advice should be specific. What works in a sample room may need adjustment on a production press. A little skepticism helps.
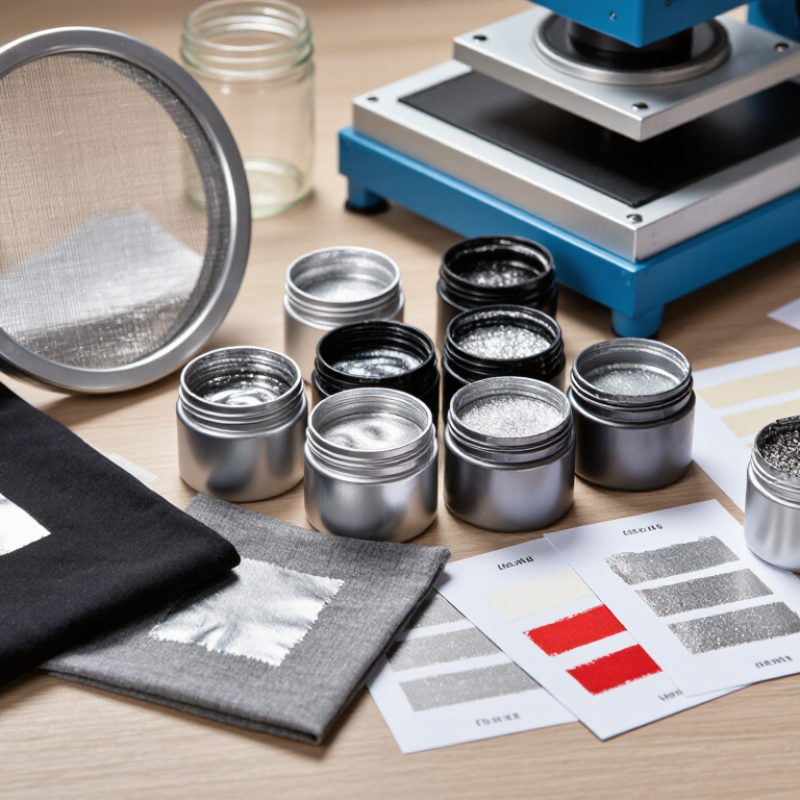
How to Choose Silver Ink for Screen Printing

Identify the Fabric or Surface and Intended Use

How to Choose Silver Ink for Screen Printing

Identify the Fabric or Surface and Intended Use

Start with the exact surface, not just the product category. Cotton jersey, polyester sportswear, nylon bags, coated fabric, and paper can need different ink systems. Textile Exchange’s Materials Market Report 2024 estimates that global fiber production reached 124 million tonnes in 2023, with polyester making up about 57 percent. That scale makes polyester common, but it does not make every polyester surface identical. Check for coatings, stretch, texture, and heat sensitivity.

On cotton, a soft shirt may tolerate a different ink feel than a stiff canvas tote. Polyester can require careful curing to limit dye migration, which may discolor a bright silver print. Test a small swatch. Really test it. For glass, metal, or coated panels, confirm the ink is intended for that surface; textile ink may not bond reliably. A quick adhesion check can save a full production run, though one test cannot predict every use condition.

Think about where the printed item will go. Daily-worn garments need checks for washing, rubbing, and flexing; a poster may need mainly surface adhesion and visual consistency. Follow the ink technical sheet for mesh, curing, and substrate preparation, then assess a sample under realistic use. Textile Exchange’s figures describe fiber production, not print performance—a distinction that is easy to overlook. If the surface has an unusual finish, record the test result and reconsider the ink choice before printing the batch.

Compare Silver Ink Types and Desired Metallic Effects

Silver screen-printing inks differ in pigment shape, particle size, and binder, so “silver” can mean anything from a soft sheen to a sharp, mirror-like flash. Aluminum-flake inks generally create stronger metallic sparkle; mica-based pigments tend to look pearlescent and more subdued. Fine particles can pass through finer mesh and produce smoother details, while coarse flakes often look brighter but may clog mesh or soften small text. Test the actual artwork. A tiny silver line can disappear under coarse particles.

Compare samples under the lighting your customers will use. Tilt each print beside a window and beneath a neutral indoor lamp; silver can shift from bright to gray as the viewing angle changes. For objective checks, ASTM D523 measures specular gloss at 20°, 60°, and 85° geometries. Record the angle and reading in your print trial notes, rather than relying on “looks shinier.” ISO 12647-5:2015 provides process-control guidance for screen printing, supporting consistent evaluation across runs.

Substrate and curing matter, too. A dark cotton shirt can make silver appear more vivid, while a pale or textured fabric may scatter its reflection. Use the same mesh, squeegee pressure, ink deposit, and cure settings when comparing types. Not always obvious. I would also keep one imperfect sample: slight mottling can reveal how the ink behaves on real fabric, though it may not suit every design. Sources: ASTM D523-14(2023); ISO 12647-5:2015.

Check Ink Compatibility with Screens and Printing Methods

Silver ink compatibility starts with the screen opening, stencil, and ink chemistry. Metallic flakes can bridge fine mesh openings, leaving patchy coverage or clogged areas. Check the ink’s technical data sheet for particle size and recommended mesh, then compare it with your screen’s actual opening—not mesh count alone. A coarser mesh may pass flakes more easily, but it can soften small text and fine edges. There is no single mesh choice for every silver ink.

Match the emulsion to the ink system: water-based inks need water-resistant stencils, while solvent-based inks require solvent-resistant ones. Also confirm that the ink suits your printing method. A thick silver ink may need slower manual strokes or adjusted automatic press settings to maintain an even deposit. Cure a test print as directed, then record adhesion results. ASTM D3359 rates tape-test adhesion on a 0B–5B scale, providing a consistent way to compare samples. Small differences in substrate preparation can still affect results.

Tips: Print a small test first. Inspect the screen after each pass for flakes or buildup. Keep a note of mesh, squeegee angle, and cure conditions; I have found that one overlooked setting can make a good ink look unreliable.

Assess Adhesion, Durability, and Curing Requirements

Silver ink can look bright on the screen and still fail on the finished surface. Check that its binder suits the substrate: cotton, polyester, paper, and coated plastics may need different formulations. Print a small test patch, then let it dry or cure fully before checking adhesion. Rub the area with a clean cloth, and apply firm tape to an inconspicuous edge. If the ink lifts or flakes, the surface may need cleaning, a different ink, or a compatible pretreatment. Small tests matter.

Durability depends on more than the metallic finish. Flex a cured fabric print several times and inspect it for cracking; on rigid items, check for scuffs after the ink has set. Follow the ink maker’s stated curing method and temperature, using a suitable thermometer rather than trusting a machine’s display alone. A brief cure can leave ink weak, while excessive heat may damage the substrate or dull the silver. Keep airflow and print thickness consistent, and verify the result after cooling. I have found that one extra test often prevents a full batch of disappointing prints. Still, results can vary with fabric blends, humidity, and equipment, so record settings and adjust carefully.

Test Print Samples Before Making a Final Selection

A silver ink can look bright on a supplier’s swatch and dull on a dark shirt. Test it on the actual fabric, paper, or other surface you plan to print. The substrate changes how metallic particles reflect light. Make several small samples, including one on a dark color and one on a light color. Keep the mesh, stencil, squeegee pressure, and drying method consistent. Small changes matter. Otherwise, it is hard to tell whether the ink or the process caused the difference.

Inspect each sample under the lighting where people will see the finished print. Tilt the material; silver may flash at one angle and appear gray at another. Check coverage, edge sharpness, hand feel, and whether the ink cracks after the material is stretched. Record the ink deposit and curing conditions beside each sample. A simple notebook works. Let samples cool fully before comparing them, since warm prints can feel misleadingly soft. If a test looks uneven, repeat it rather than judging the ink from one imperfect pass. Even careful tests have limits, so note any variation in fabric texture or pressure before choosing a final setup.

How to Choose Silver Ink for Screen Printing

Test print samples before making a final selection.

Example screening results show average opacity from three test prints on the same dark fabric using identical print and curing conditions. These illustrative readings are not product specifications. Compare opacity alongside adhesion, wash durability, and hand feel on your own substrate before choosing an ink.

Contact Us
